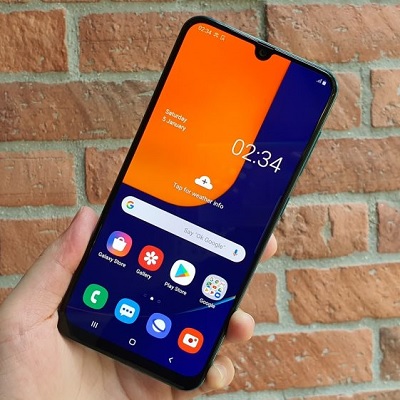
But the company did not stop there. Further, they even launched a new refreshed Galaxy A series as well as the Galaxy M series. Although there was no difference in these devices, they did leave a mark in the Android market. Recently, the company has launched Samsung Galaxy A70s, a successor to their earlier A70. However, when you compare Galaxy A70 vs A70s, there are very few minor changes. Similar to A70, Galaxy A70s features the same Qualcomm Snapdragon 675 processor. Moreover, it runs the Android 9.0 Pie version out of the box with One UI. The major note-worthy change is its camera. To be specific about the Galaxy A70s camera, it sports a triple camera setup of 64MP primary wide lens, 8MP ultra-wide, and 5MP of depth sensor. With such amazing Galaxy A70s specs, it does click beautiful pictures of great quality. You can get a good amount of details with the scene optimizer which brings out more punchy and vibrant colors as compared to its predecessor. On the other hand, for selfies, it offers a 32MP wide camera lens. Looking at the display, this handset sports a diamond-cut finish on the back which is similar to that of Galaxy A50s and A30s. Besides, it comes with a 6.7-inches Infinity U display with a resolution of 1080 x 2400 pixels. In this tutorial, we’ll guide you on how to flash TWRP Recovery on Galaxy A70s. Want to Root Android phone? Want to flash custom ROM on Samsung Galaxy A70s? If yes, then install custom recovery first.
How to Install TWRP Recovery on Galaxy A70s
In this article, we’ll install TWRP recovery on Galaxy A70s using ADB and fastboot commands. Additionally, we’ll even use the Odin tool to do the same. Without waiting anymore, let’s begin the process to install the latest official TWRP recovery on the Samsung Galaxy A70s SM-A707F smartphone.
Disclaimer
Proceed at your own risk. We at Droid Thunder will not be responsible for any damage. Also do not perform anything on your own.
Pre-Requisites
To avoid any interruption, charge your phone to a minimum of 50% before going ahead. Install Samsung Galaxy A70s USB drivers on your PC, to detect your phone. Enable USB Debugging on Galaxy A70s. Also, enable OEM unlock mode from the Developer options. For safety, backup your contacts, apps, messages, call logs, notes, etc.
Steps to install TWRP Recovery on Galaxy A70s
Here, we’ll use two methods to flash the custom recovery.
Method 1: ADB & fastboot
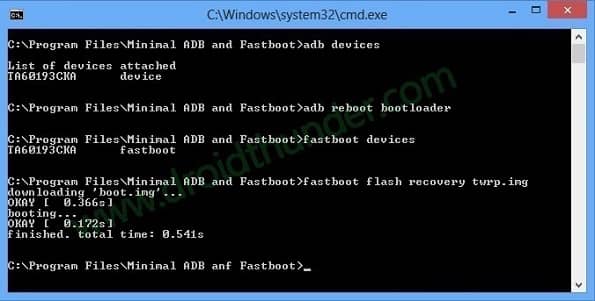
Step 1: Download ADB drivers. Step 2: Install it on your computer. Step 3: Download TWRP.img. Step 4: Move this downloaded twrp.img file to the location C:\Program Files\Minimal ADB and Fastboot folder (where you’ve installed the ADB drivers). Step 5: Connect your phone to PC through USB cable. Step 6: On PC, go to C:\Program Files\Minimal ADB and Fastboot folder, hold the Shift button, and right mouse click on a space. You’ll see a list of options from which select the Open command window here option. This will launch the cmd window. Step 7: Type the below command in the cmd window and press enter: adb devices As soon as you press enter, a message saying ‘List of devices attached’ will appear. This will confirm a successful connection between your phone and PC. Note: If such a thing doesn’t happen, then re-install Samsung USB drivers from the links given above.
How to fix USB Device Not Recognized error
Step 8: Moreover, enter the following command to boot Galaxy A70s into fastboot mode. adb reboot bootloader Step 9: Now to verify whether fastboot is functional or not, enter the following command: fastboot devices Note: Few random numbers will confirm that fastboot is indeed functional. Step 10: Let’s install TWRP recovery on Galaxy A70s now. To do so, enter the below command: fastboot flash recovery twrp.img
This will start the Samsung Galaxy A70s TWRP recovery flashing process. Finally! This is how you can install TWRP recovery on Galaxy A70s smartphone using ADB and fastboot commands.
Method 2: Odin Tool
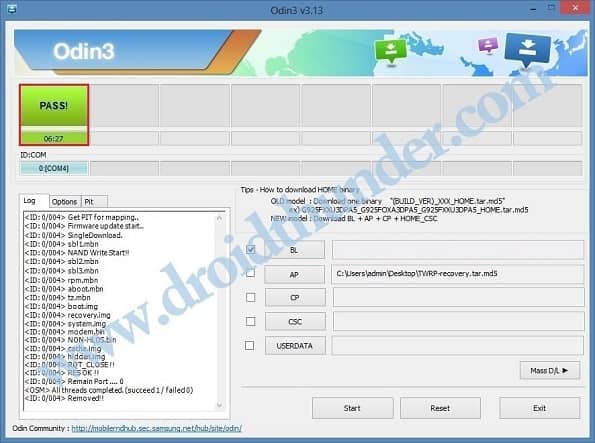
Step 1: Download the Odin tool. Step 2: Download TWRP recovery. Step 3: Power off your phone and boot it into download mode. Step 4: To do so, press and hold the Power button+ Volume down key simultaneously until the download mode appears. Step 5: Next, connect your to PC using a USB cable. Step 6: On PC, open the downloaded Odin tool. The ID: COM section will turn blue along with an Added message. This will confirm that your phone is correctly recognized by the PC. Note: If such a thing doesn’t happen, then change the USB cable or the USB port. Step 7: Moreover, tick the Auto Reboot and F.Reset Time options. Note: Do not any other options. Step 8: Finally, tap on the AP button. Then browse and select the downloaded TWRP recovery.tar.md5 file. Step 9: To begin the TWRP Samsung Galaxy A70s installation process, simply click on the Start button. Wait until the installation finishes. As soon as it completes, the ID: COM section will turn green with a Pass message.
Note: If Odin fails to flash TWRP, then close it, again boot your device into download mode and repeat the entire process. Finally! You’ve successfully installed TWRP recovery on Samsung Galaxy A70s using the Odin flash tool.
Steps to Boot Galaxy A70s into TWRP recovery mode
Step 1: Power off your Galaxy A70s. Step 2: Press and hold the Volume up button + Power button simultaneously. As soon as you see the TWRP logo, let go of both the buttons. Note: If you are not able to reboot the phone into recovery, use the TWRP Manager app from Google Play Store.
Conclusion
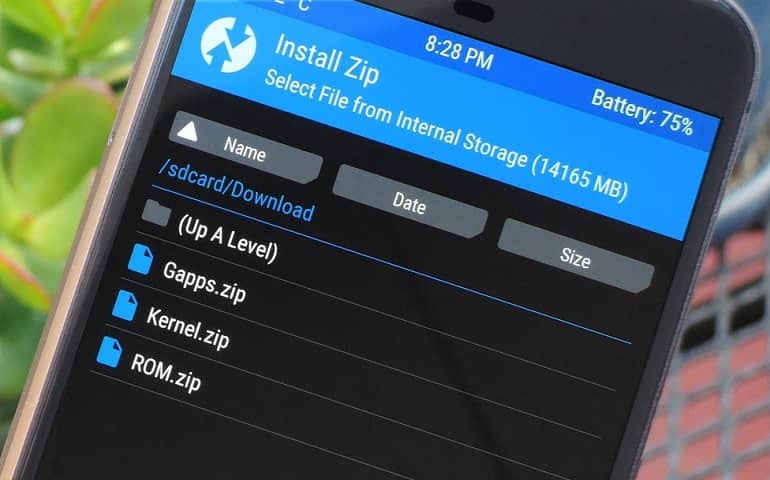
Finally! This is how you can download and flash TWRP recovery on Samsung Galaxy A70s SM-A707F smartphone. Now you are free to root Galaxy A70s, install custom ROM like LineageOS, flash custom kernel, mods, overclock, and do much more. If you come across any difficulty, or issues during this tutorial then do let me know. Notify me of follow-up comments by email. Notify me of new posts by email.
Δ
