SD cards are great but they’re fragile and don’t like being mistreated. They’re used in phones and cameras so tend to contain valuable files. So when a card stops working you can lose a lot. Here we’ve focussed on recovering files including photos, videos and documents from a card that’s not working properly, but the principles apply to deleted files as well.
Don’t format if you want to recover files
Don’t format the card if you want to retain any of the photos on it. You can follow the tips in our separate article on how to format a write-protected SD card after you’ve tried to recover any files that are on your card. Now, try and find a different card reader. If you’ve inserted an SD card into your laptop or PC’s built-in slot and nothing happens, try using a different computer or a USB card reader. Sometimes it’s the reader at fault – not the card. You can buy a USB SD card reader for just a few pounds or dollar which will accept both microSD and standard SD cards.
File recovery software
There are many free programs which claim to be able to recover data from corrupt or ‘dead’ memory cards. We explain step by step how to use Disk Digger to recover accidentally deleted files, but the same process works for SD cards whose contents can’t be seen in Windows Explorer. If you don’t like Disk Digger, try any one of a number of other file recovery apps including EaseUS Free Data Recovery When using such software, there are no guarantees you’ll get your files back intact, and typically they will lose their original file names which could be an issue for some people. Others will be able to rename recovered files with relative ease. Some free recovery programs are limited on the number of files or amount of data they will recover, so look for any limitations before downloading. Also beware of additional unwanted programs which might be installed alongside free software: never use the ‘Recommended’ installation option. Always choose ‘Manual’ and carefully read each screen, opting out of search bars and other software. Another option is Recuva, which offers both free and paid versions. Most programs work in a similar fashion, but these instructions will give you an overview of how to use them. We’ll use ZAR (Zero Assumption Recovery). Install ZAR, then insert the damaged SD card into your PC’s card reader. Launch ZAR. (You may have to disable your PC’s security software, in which case we recommend you also disable the internet connection). When prompted, click the Image Recovery (Free) option. This will help you to recover photos from an SD card. ZAR will now look for devices that are installed, and you need to point it toward the offending SD card. Select the correct disk and click Next. ZAR will now analyse your SD card. This will take a few minutes. Once this is complete you’ll see a list of the recovered files. On most SD cards the chances are that clicking the ‘Root’ checkbox will select all the images. Click Next and you can then select the folder into which recovered files will be placed. By default this will be the same as the folder your chose to save (so ‘Root’, in all likelihood). One important point: you will be asked to select a destination folder for the recovered files. Make sure you choose one on your PC’s hard disk and not back on to the corrupt SD card, since that won’t work. It will take a few minutes for the files to copy across. Once this is complete browse to the destination folder you selected. You should find most if not all of the files you wanted to rescue. They may have lost their file names, so you might have an extra job to rename them – this could include adding a file extension so they’re correctly recognised by Windows.
Tips for fixing a dead SD card
Standard size SD cards can be flimsy due to their thin plastic shells and these are easy to break if you carry cards in your pocket or unprotected in your bag. Sometimes the little write-protection switch will fall out, making your SD card stop working in a camera or any other device which needs to be able to write to it. Regardless of the reason behind an SD card being write-protected, you won’t be able to delete files in this state, since the file allocation table needs to be changed and this involves writing to the card.
If your card is physically ok, and the switch (where present) is in the ‘unlocked’ position, you can try one of Windows’ built-in tools to attempt to fix it.
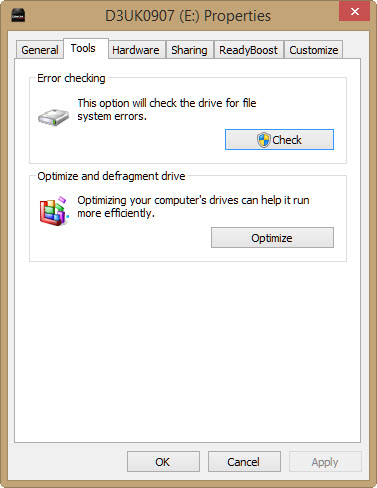
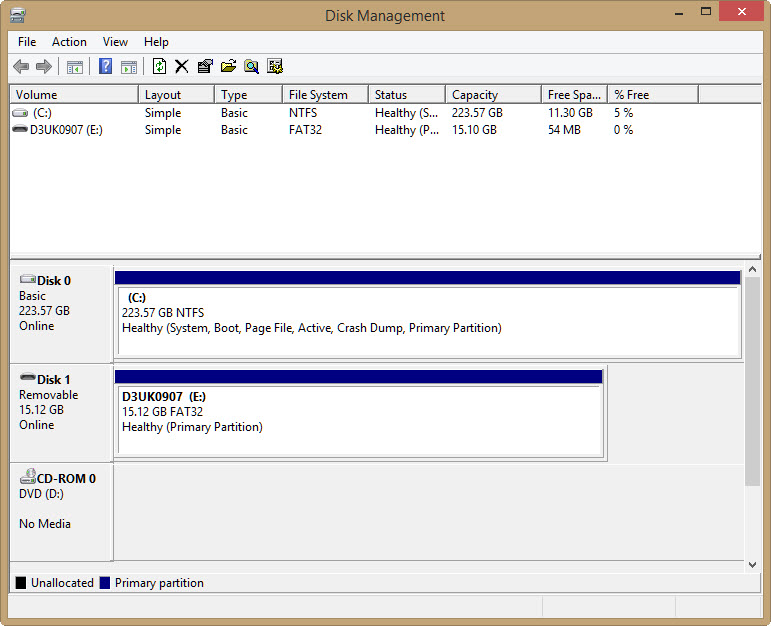
You options will vary depending on whether your card appears in Windows Explorer or not. If it does, right click on it, choose Properties, then the Tools tab. Click on Check and Windows will scan the card for errors and try to fix them. If the SD card doesn’t appear in Explorer, search the Start menu for Disk Management. In this tool you can see which drives Windows can ‘see’ and the list can include drives which don’t have a drive letter. If you can’t identify your SD card in the list of drives, it’s either completely dead or the card reader isn’t working properly (perhaps due to a problem with drivers). If the SD card is there, but without a drive letter, you should be able to right click on it and use the available options to give it a drive letter or format it to a file system that Windows can read and can then allocate a letter.
If you need to erase your SD card and Windows isn’t doing the trick, here’s how to format an SD card. Matt Egan is Global Editorial Director of IDG, publisher of Tech Advisor, and a passionate technology fan who writes on subjects as diverse as smartphones, internet security, social media and Windows.


