Let us see how to set the iPhone camera to 4K and record stunning videos.
Set iPhone Camera to 4K from Settings
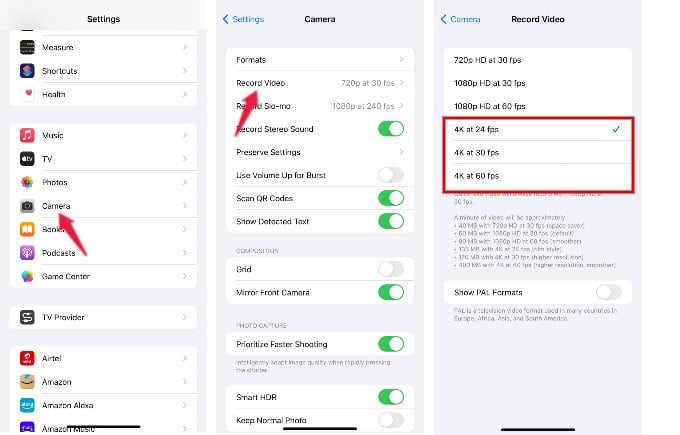
Though 4K quality video recorded on iPhone provides 4 times higher resolution than 1080p, it consumes more storage as well. If you are using iPhone 6S or later, you can record videos in 4K resolution. However, the frame rates will vary depending on the model. On your iPhone, tap Settings > Camera. From the next screen, tap Record Video. Here, in the Record Video screen, you can see the list of all supported video formats. In this example, we have used the iPhone XR model which lists three options for 4K:
4K at 24 fps4K at 30 fps4K at 60 fps.
Go ahead and tap on the desired option. From now on, your videos will be recorded in 4K quality till you set another format. Do remember that a minute-long video of 4K at 60 fps will provide an excellent resolution but will consume 400 MB of storage.
Switch iPhone Camera to 4K from Camera App
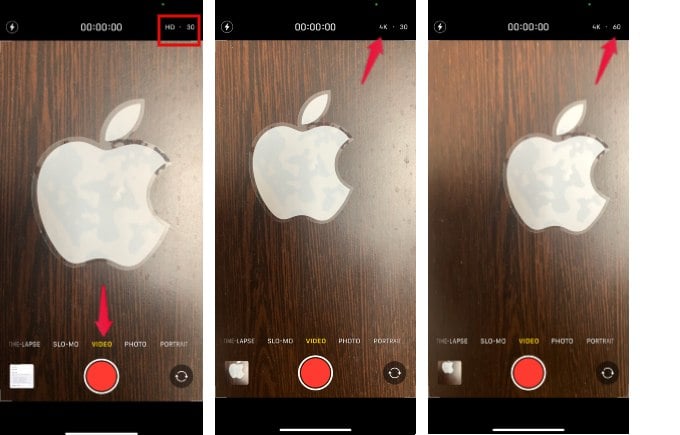
Instead of configuring the video quality in Camera Settings, you can also modify that from the Camera app while recording videos. This option is better especially if you are concerned more about the storage on your device. Let’s see how to do that. Launch the Camera app on your iPhone and tap Video on the bottom to put your camera in video mode. On the top right of the screen, you will see two small texts. Go ahead and tap on the first one to change the video quality. Keep tapping till you see 4K. Tap on the second text, to change the frame rate to 24, 30, or 60 fps. Do remember that this setting will be applicable till the Camera app is not closed. If you close the app and open it, the resolution will be set to the value in Settings > Camera.
Δ


